
Size: Sm Med Lg X-Lg
Finished Measurement: 12" 14" 16" 18"
(from neck to base of tail)
(from neck to base of tail)
Size Note: Instructions are written for size Small, with sizes Medium, Large, and X-Large in braces { }. Instructions will be easier to read if you circle all the numbers pertaining to your dog’s size. If only one number is given, it applies to all sizes.
Materials:
Worsted Weight Yarn : 3{4-5-6} ounces, [90{110-140-170} grams, 170{225-285-340} yards]
Straight knitting needles, size 7 (4.50 mm) or size needed for gauge
Stitch holder
Markers - 2
3/4" Buttons - 2
Yarn needle
Materials:
Worsted Weight Yarn
: 3{4-5-6} ounces, [90{110-140-170} grams, 170{225-285-340} yards]Straight knitting needles, size 7 (4.50 mm) or size needed for gauge
Stitch holder
Markers - 2
3/4" Buttons - 2
Yarn needle
Note: When making a garment, correct gauge is critical to ensure fit.
GAUGE: In pattern, 20 sts and 26 rows = 4"
GAUGE: In pattern, 20 sts and 26 rows = 4"
Instructions:
BODY:
Cast on 40{44-52-56} sts.
Row 1: Knit across.
Rows 2-7: K1, increase, knit across to last 2 sts, increase, K1: 52{56-64-68} sts.
Row 8 (Right side): K6, place marker, knit across to last 6 sts, place marker, K6.
Note: Loop a short piece of yarn around any stitch to mark Row 8 as right side.
Rows 9 and 10: Knit across to first marker, (P2, K2) across to next marker, knit across.
Rows 11 and 12: Knit across to first marker, (K2, P2) across to next marker, knit across.
Repeat Rows 9-12 for pattern until Body measures approximately 11{13-15-17}" from cast on edge, ending by working a wrong side row.
NECK SHAPING:
Note: Both sides of the Neck are worked at the same time, using separate yarn for each side. This guarantees that both sides will be the same length. Maintain established pattern throughout.
Note: To maintain established pattern, simply look at a stitch as it faces you and determine whether it is a knit or purl stitch, then proceed with the proper stitch to continue the pattern.
Row 1: Work across 18{18-20-22} sts, slip next 16{20-24-24} sts onto st holder; with second yarn, work across: 18{18-20-22} sts each side.
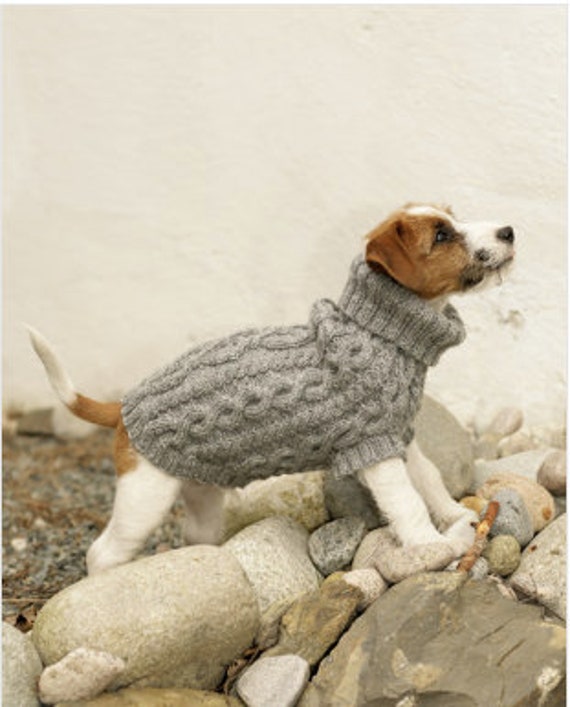
KNITTING PATTERN Dog Aran Sweater Dog/aran Yarn Dog Pet
Row 2 (Decrease row): Work across to within 2 sts of Neck edge, K2 tog; with second yarn, slip 1 as if to knit, K1, PSSO, work across: 17{17-19-21} sts each side.
Rows 3 and 4: Repeat Row 2: 15{15-17-19} sts each side.
Continue to decrease one stitch at each Neck edge, every other row, 3{3-4-5} times: 12{12-13-14} sts each side.
Work even until Coat measures approximately 14{161/2-181/2-21}" from cast on edge, ending by working a wrong side row.
Bind off all sts.
FINISHING:
Neckband
With right side facing, pick up 18{22-22-24} sts along right Neck edge, slip 16{20-24-24} sts from st holder onto empty needle and knit across, pick up 18{22-22-24} sts along left Neck edge: 52{64-68-72} sts.
Knit 8 rows.
Bind off all sts in knit.
Band
With right side facing and beginning 51/2{61/2 - 71/2 - 81/2}" down from left bound off edge, pick up 10 sts evenly spaced across 2".
Knit every row until Coat fits snugly around Dog’s chest.
Next Row (Buttonhole row): K2, YO (buttonhole), K2 tog, K2, K2 tog, YO (buttonhole), K2.
Knit 3 rows.
Bind off all sts in knit.
Sew end of Right Neck to end of Left Neck.
Weave in yarn ends.
Sew Buttons to Body, opposite Band.
Generals for Knit Sweater
MARKERS
Place markers as instructed. When you reach a marker on a row, slip it from the left needle to the right needle (Fig. 1); remove it when no longer needed.
Fig. 1
Fig. 1

KNIT INCREASES
To make a knit increase, knit the next stitch but do not slip the old stitch off the left needle (Fig. 2). Insert the right needle into the back loop of the same stitch (Fig. 3)and knit it, then slip the old stitch off the left needle.To increase evenly across a row, add one to the number of increases required and divide that number into the number of stitches on the needle. Subtract one from the result and the new number is the appropriate number of stitches to be worked between each increase. Adjust the number as needed. Sometimes it’s necessary to work more or less stitches between increases to arrive at the correct total number of stitches.
Fig. 2

Fig. 2
Fig. 3

DECREASES
Knit 2 Together
To Knit 2 Together (abbreviated K2 tog), insert the right needle into the front of the first two stitches on the left needle as if to knit (Fig. 4), then knit them together as if they were one stitch. (This decrease slants to the right.)
Fig. 4

Fig. 4
SLIP 1, KNIT 1,
PASS SLIPPED STITCHED OVER
To Slip 1, Knit 1, Pass Slipped Stitch Over (abbreviated slip 1, K1, PSSO), slip one stitch as if to knit, then knit the next stitch. With the left needle, bring the slipped stitch over the knit stitch (Fig. 5) and off the needle. (This decrease slants to the left.)
Fig. 5

Fig. 5
PICKING UP STITCHES
When instructed to pick up stitches, insert the needle from the front to the back under two strands at the edge of the worked piece (Fig. 6). Wrap the yarn around the needle as if to knit, then bring the needle with the yarn back through the stitch to the right side, resulting in a stitch on the needle.
Fig. 6

Fig. 6
Repeat this along the edge, picking up the required number of stitches.
A crochet hook may be helpful to pull yarn through.
YARN OVERS
After a knit stitch, before a knit stitch: Bring the yarn forward between the needles, then back over the top of the right needle, so that it is now in position to knit the next stitch (Fig. 7).
Fig. 7

Fig. 7
Knit Instructions
Knit instructions are written using abbreviations, symbols, terms, and punctuation marks. This method of writing saves time and space, and is actually easy to read once you understand the knit shorthand.
Abbreviations
K knit
M1 make one
mm millimeters
P purl
PSSO pass slipped stitch over
SSK slip, slip, knit
SSP slip, slip, purl
st(s) stitch(es)
tbl through back loop(s)
tog together
YO yarn over
Symbols and Terms
change to larger size needles — replace the right needle with one larger size needle and work the stitches from the left needle as instructed; at the end of the row, replace the left needle with the other larger size needle.
loosely — (binding off, adding new, or casting on stitches) the work should be as elastic as the knitting.
right vs. left — the side of the garment as if you were wearing it.
right side vs. wrong side — the right side of your work is the side that will show when the piece is finished.
work even — work without increasing or decreasing in the established pattern.

Punctuation
When reading knitting instructions, read from punctuation mark to punctuation mark. Just as in reading, commas (,) mean pause and semicolons (;) mean stop.
colon (:) — the number(s) given after a colon at the end of a row or round denote(s) the number of stitches you should have on that row or round. When repeating rows, the number given is for the last row.
braces { } — contain information or instructions pertaining to multiple sizes.
parentheses ( ) or brackets [ ] — indicate repetition, so you should work the enclosed instructions as many times as specified by the number immediately following. Parentheses or brackets may also contain explanatory remarks.
Gauge
Gauge is the number of stitches and rows per inch and is used to determine the finished size of a project. Most knitting patterns specify the gauge that you must match to ensure proper size or fit and to ensure you have enough yarn to complete the project. Before beginning any knitted item, it is absolutely necessary for you to knit a sample swatch in the pattern stitch with the weight of yarn and needle size suggested. It must be large enough for you to measure your gauge, usually a 4" square. After completing the swatch, measure it. If your swatch is larger or smaller than specified, make another, changing needle size to get the correct gauge. Remember, DO NOT HESITATE TO CHANGE NEEDLE SIZE IN ORDER TO MAINTAIN CORRECT GAUGE. Once you have obtained the correct gauge, you should continue to measure the total width of your work every three to four inches to be sure your gauge does not change.
Terminology
U.S. and International terminologies differ slightly. Equivalents are:


FREE FOR YOU from Leisure Arts, Inc. ©2013 All rights reserved. These instructions may be photocopied and shared with your friends. They may not be kitted or sold. We have made every effort to ensure that these instructions are accurate and complete. We cannot, however, be responsible for human error, typographical mistakes, or variations in individual work.


No comments:
Post a Comment