Wednesday, June 26, 2019

Quick and Easy to Memorize Crochet Patterns to Make in a Weekend

Quick and Easy to Memorize Crochet Patterns to Make in a Weekend 50 Plus Projects

Crochet in a Weekend Autumn 2019

Make the Most of Your Weekend Crochet Projects with over 50 patterns to start making now for gifts ideas, home decor, holidays and more!
Crochet in a Weekend  is the perfect source for your next crochet project. Whether you need a quick gift or something for your home. Plus, these patterns are easy to crochet and memorize.

note this post contains affiliate links to help support my yarn habit

Patterns include everything from crochet hats, pumpkins, cozy cup holders, gift card holders, scarves, stockings, Christmas decorations, fall decor, scarves, rugs, gift ideas and more!

Crochet in a Weekend GiftsCrochet in a Weekend


Make the most of your weekend! This issue includes many short, easy patterns that are perfect to make over a relaxing weekend. Use your spare moments to stitch up fashionable accessories, timeless gifts, holiday decorations and home accents. You’ll love the ease and the satisfaction of completing projects in so little time!
  • Quick and cozy! An easy-to-memorize two-row repeat pattern makes the beautiful and versatile Blue Horizon Shawl. After a relaxing weekend of crocheting, your finished piece will be ready to wear as a shawl or a scarf.
  • The PURRfect pattern! Adorable and easy, the Chat Noir Beanie is crocheted in worsted-weight yarn. The cute features are simple-to-crochet appliqué shapes that you can sew on after the hat is complete.
  • Adorn your favorite couch with the Speedy Stripes Throw. Using a super bulky yarn, a giant hook and a one-row repeat pattern, you’ll have this stylish throw finished in no time! The three coordinating colors make the simple pattern look stunning.
Plus, you won’t want to miss our Christmas in the Nick of Time feature! Crochet ornaments and festive decor that you’ll love to display or give as heartfelt gifts—all with quick and easy patterns!

Quick gifts to crochet afghanCrochet snowman pillow crochet patternCrochet quick gifts change purseCrochet gift ideas quick giftsCrochet cat hat patternCrochet bowl patternCrochet hat and scarf patternCrochet scarf shawl patternCrochet bowl patternCrochet wine bottle patternCrochet quick and easy afghan pattern


Quick and Easy to Memorize Crochet Patterns to Make in a Weekend

Wednesday, June 19, 2019

Free Crochet Kitchen Dish Towel Patterns that are Easy to Make

Free Crochet Kitchen Dish Towel Patterns that are Easy to Make

Free Crochet Kitchen Hand Towels Patterns
Crochet a Kitchen towel to use and display in your home. Using absorbent cotton yarn these fun and easy to crochet towel patterns are some of our favorites to crochet.
Try using Lion Brands Re-Up Yarn with these patterns to get the best results. Re-Up, Lion Brand’s new recycled cotton, gives knitters and crocheters another reason to love working with cotton. It’s eco-friendly! It takes, on average, 20,000 liters of water to make 1 kilogram of cotton. By using one 70 gram ball of Re-Up you are saving 1,400 liters of water. 

note this post contains affiliate links and I may be compensated at no additional cost to you.


Free Crochet Kitchen Hand Towel Patterns


We love this pattern because you can easily mix and match it with your kitchen colors. It's easy to crochet and you'll love how it looks and feels.


These kitchen towels make great gift ideas for family and friends. Plus you can crochet them for the kitchn or to match a bathroom.


Here's a multi-colored towel that would look great in any color. Choose from greens, blues, reds, different shades of brown, grey, yellow, or any colors to match your decor.


Need some stripes in your kitchen or bath? These pretty towels are easy to crochet and pretty when completed in your favorite yarn colors.


Stripes are in style and perfect for your home and kitchen decor. Choose from bright colors or neutrals to make your favorite kitchen hand towel!


Here's a colorful way to make a kitchen towel. Use a variety of yarn colors or scrap yarn to crochet a towel with this free pattern.


An easy to crochet dish towel pattern with a stripe!


A dish towel to crochet for everyday use...

More Patterns to Crochet...


Pillow Ticking Kitchen Set Crochet Pattern

Pillow Ticking Kitchen Set Crochet Pattern


Free Crochet Kitchen Dish Towel Patterns that are Easy to Make

Friday, June 14, 2019

Free Market Bag Pattern for Crochet Made Using Premier Cotton Yarn

Free Market Bag Pattern for Crochet Made Using Premier Cotton Yarn


Kids are out of school, summer is in the air and we're ready for some fun! We invite you to join the Annie's Market Bag Summer Adventure! 
This pattern is available for free for a limited time so be sure to download it from June 14-30 and share your photos on the Annie's Crochet Facebook page.
this post contains affiliate links
Join the Facebook page and get the pattern along with other great crochet projects, instructions and advice.


Premier Home Cotton Yarn


This varied palette of colors is perfect for kitchen and other home decor projects. When worked together, the solids and the multicolored yarn will blend to make something truly unique. Whip up a few pot holders or dishcloths and give them as gifts at your next family gathering!

Crochet Farmers Market Bag PatternCrochet Farmers Market Bag Pattern


FINISHED MEASUREMENTS 16 inches wide x 28 inches long,  including strap

Head to the farmers market in style with this easy and fast market bag that is made using a popcorn and mesh pattern.

If you missed the free pattern (June14-30, 2019) you can purchase the pattern below through Annie's website

Download or Printed Farmer's Market Bag Crochet Pattern


Market Bags To Crochet Pattern Book
Free Market Bag Pattern for Crochet Made Using Premier Cotton Yarn

Tuesday, June 11, 2019

A Quick and Easy Way to Crochet Preemie Hats for Baby Free Crochet Pattern

A Quick and Easy Way to Crochet Preemie Hats for Baby Free Crochet Pattern


Red Heart Preemie Hats, Crochet
Crochet a hat for a newborn preemie baby. Donate these easy to crochet hats to charities, hospitals and new parents. Use bright happy yarn colors to welcome these small little ones into the new world!
So easy and quick to make for the tiniest baby's head!
With a little bit of yarn and a few minutes of your time, you can make caps for newborns!

note this download also includes pattern to knit preemie hats


this post contains affiliate links


This exclusive pattern is easy to learn and quick to make. And it is worked in the round, so has no seams to finish, and is ideal for baby's soft head. Get your friends together and each make a hat to donate! It is fun, takes very little time and can help save newborns at risk.


A Quick and Easy Way to Crochet Preemie Hats for Baby Free Crochet Pattern

Easy Ways to Sew a Market Bag Sewing Pattern

Easy Ways to Sew a Market Bag Sewing Pattern


The perfect way to sew a bag for everyday use. The Tote Sewing pattern or  Kit is a great go-to bag.

this post contains affiliate links and I may be compensated for a purchase to support my craft habit.

The tote bag is so fun and easy to make in bright fabric colors that you will love to carry everywhere!
The outside of this tote features a scrappy design. This kit comes with all of the fabrics you'll need for the outer bag, lining, and straps.
Turn a package of precut 5" squares into a tote that's perfect for your trips to the market!. Easy to assemble and a quick project for any afternoon! Bag size, 13 1/2" x 13 1/2" x 4 1/2". Previously published in Quilter's World Spring 2018.

Kit includes pattern and fabric from the Moda Scarlet & Sage collection. Kit contains all fabric needed to make the bag, including 1 charm pack (you will receive extra charm squares) and fabric for lining.


Easy Ways to Sew a Reversible Tote Bag using the Reversible Tiki Tote Mystic Dawn Kit

Wednesday, June 5, 2019

How To Make Ice Cream With An Ice Cream Ball

How To Make Ice Cream With An Ice Cream Ball

  UCO MEGA Play & Freeze Ice Cream Maker
Play And Freeze Ice Cream Ball
It's hot outside and you are looking forward to a cool bowl of ice cream. Why not make your own? It an fun and easy thing to do with your family especially the kids.

Make ice cream while on picnics, camping, parties and many other places! No electricity is required . You can roll it around, pass it to others, play with the kids with the ice cream ball for about 10 or 15 minutes before the ice cream is made. It's lightweight and easy to clean!

Directions and recipes come with the ball..
Find Play and Freeze Ice Cream Makers on eBay

Here is how it works...

Restaurant Aluminium Alloy Non-stick Ice Cream Cake Ball Digging Scoop BallerFill the ice end with as much ice as possible, then add 1/2 cup of rock salt to the pint size or 3/4 cup to the Mega size. The lid should be hand tightened--do not use the wrench.
Mix up your ice cream ingredients in a container, then pour the mix into the end with the metal cylinder, leaving about one inch for expansion at the top. Hand tighten the lid.
Have a ball! Shake, roll, and pass it around as you mix and freeze the ingredients. It's not necessary to shake the ball...just motion will do it.


After about 10 minutes for the pint size and 15 minutes for the Mega ball, open the ice cream end using the included plastic wrench. Scrape the sides of the cylinder to mix up the ice cream using a plastic or wooden spoon (don't use a metal spoon as it will scratch the cylinder). Then check the ice end. Pour out the excess water and add more ice and up to 1/3 cup more rock salt to enhance the freezing ability. Close the lids securely and continue having a ball for approximately 5 to 10 more minutes (15 for the Mega).
You will then have about a pint (or quart for the Mega ball) of delicious soft-serve ice cream. The consistency will vary based on the ice, your mix, the outside temperature, shaking frequency, etc. Once the ice cream is to the consistency of your liking, gently scoop it out and enjoy!
Here are some great recipes for the Ice Cream Ball
Basic Vanilla Ice Cream
1 pint of Half & Half1 ½ teaspoons vanilla1/3 cup + 2 tablespoons sugar
For richer tasting ice cream use cream instead of half & half.
Variations (add to Vanilla Ice Cream Recipe)
Juice Slush Pour 1 pint of sweetened or unsweetened juice or a combination of juices into the metal cylinder, and
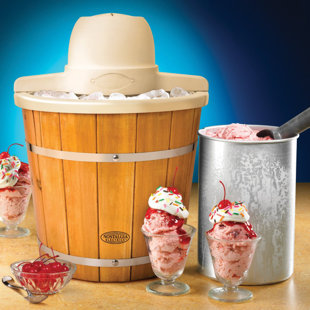
 PLAY AND FREEZE™ to the consistency you desire.
Frozen Yogurt Place 2 cups of flavored or fruited yogurt into the metal cylinder, then PLAY AND FREEZE™ to the consistency you desire. Plain yogurt can also be used, just add 1/3 cup of sugar or 1 cup of honey. Fruit may be added instead of sweetener especially fruits canned in their own juices.
To learn more about making ice cream Visit this Link
Ice Cream Ball


Nostalgia Electric 4Qt. Ice Cream Maker

Crochet a Collection of Coasters and Small Vintage Doilies


Kindle and Barnes and Noble eBook
Download these vintage patterns from Amazon Kindle or Barnes and Noble Nook.  No Kindle or Nook is required you can download on your laptop, iPhone, iPad and many other applications.
Vintage patterns have a unique style of their own and with these patterns you can crochet a one-of-a-kind small doily or coasters. This collection of 12 vintage patterns features coasters to crochet for your drinks and small doilies to place on tables and desks. 
Contents
Abbreviations
Companion Coasters
Coaster Cup Holders
Doily 6.5 inch design
Glass Jackets
Handmade Coasters
Doily 5 Inch Diameter
Daisy Doily Coaster
Chic Circle Coasters
Flower Coaster Set
Coasters for Glasses (Glass Coaster Set)
Refreshment Set
Normandy Doily


Free Knitting Pattern for Classic Pillows


Knit pillow patterns
1. DELIGHTFUL DIAMONDS
MATERIALS
Worsted Weight Yarn:
4
1/2" ounces, (130 grams, 295 yards)

Knitting needles, size 7 (4.50 mm) or size needed for gauge
Yarn needle
Pillow form - 14" square

GAUGE: In Stockinette Stitch,
9 sts and 13  rows = 2"

PILLOW COVER (Make 2)
Cast on 63 sts.

Row 1: Purl across.

Row 2 (Right side): Knit across.
Row 3: Purl across.

Row 4: K 31, P1, knit across.

Row 5: P 30, K1, P1, K1, purl across.

Row 6: K 30, P1, K1, P1, knit across.

Row 7: P 11, K1, P 17, K1, P3, K1, P 17, K1, P 11.

Row 8: K 10, P1, K1, P1, K 15, P1, K5, P1, K 15, P1, K1, P1, K 10.

Row 9: P 10, K1, P1, K1, P 15, K1, P5, K1, P 15, K1, P1, K1, P 10.

Row 10: K9, P1, K3, P1, K 13, P1, (K3, P1) twice, K 13, P1, K3, P1, K9.

Row 11: P8, K1, P5, K1, P 11, K1, P3, K1, P1, K1, P3, K1, P 11, K1, P5, K1, P8.

Row 12: K8, P1, (K2, P1) twice, K 11, P1, K3, P1, K1, P1, K3, P1, K 11, P1, (K2, P1) twice, K8.

Row 13: P7, K1, P2, K1, P1, K1, P2, K1, P9, K1, (P3, K1) 3 times, P9, K1, P2, K1, P1, K1, P2, K1, P7.

Row 14: K6, P1, K2, P1, K3, P1, K2, P1, K7, P1, K3, P1, K5, P1, K3, P1, K7, P1, K2, P1, K3, P1, K2, P1, K6.

Row 15: P6, K1, P2, K1, P3, K1, P2, K1, P7, K1, P3, K1, P5, K1, P3, K1, P7, K1, P2, K1, P3, K1, P2, K1, P6.

Row 16: K5, P1, (K2, P1, K5, P1) twice, K3, P1, K7, P1, K3, P1, K5, (P1, K2, P1, K5) twice.

Row 17: P6, K1, P2, K1, P3, K1, P2, K1, P5, K1, P3, K1, P9, K1, P3, K1, P5, K1, P2, K1, P3, K1, P2, K1, P6.

Row 18: K6, P1, K2, P1, K3, P1, K2, P1, K5, P1, K3, P1, K9, P1, K3, P1, K5, P1, K2, P1, K3, P1, K2, P1, K6.

Row 19: P7, K1, P2, K1, P1, K1, P2, K1, P5, K1, P3, K1, (P5, K1) twice, P3, K1, P5, K1, P2, K1, P1, K1, P2, K1, P7.

Row 20: K8, P1, (K2, P1) twice, K5, P1, K3, P1, K5, P1, K1, P1, K5, P1, K3, P1, K5, P1, (K2, P1) twice, K8.

Row 21: P8, K1, (P5, K1) twice, P3, K1, P5, K1, P1, K1, P5, K1, P3, K1, (P5, K1) twice, P8.

Row 22: K9, P1, K3, P1, (K5, P1, K3, P1) 4 times, K9.

Row 23: P 10, K1, P1, K1, P5, K1, P3, K1, (P5, K1) 3 times, P3, K1, P5, K1, P1, K1, P 10.

Row 24: K 10, P1, K1, P1, K5, P1, K3, P1, (K5, P1) 3 times, K3, P1, K5, P1, K1, P1, K 10.

Row 25: P 11, K1, (P5, K1, P3, K1) twice, (P3, K1, P5, K1) twice, P 11.

Row 26: K 16, P1, K3, P1, K5, P1, K3, P1, K1, P1, K3, P1, K5, P1, K3, P1, K 16.

Row 27: P 16, K1, P3, K1, P5, K1, P3, K1, P1, K1, P3, K1, P5, K1, P3, K1, P 16.

Row 28: K 15, P1, K3, P1, K5, P1, (K3, P1) 3 times, K5, P1, K3, P1, K 15.

Row 29: P 14, K1, P3, K1, (P5, K1, P3, K1) 3 times, P 14.

Row 30: K 14, P1, K3, P1, (K5, P1, K3, P1) 3 times, K 14.

Row 31: P 13, K1, P3, K1, P5, K1, P3, K1, P7, K1, P3, K1, P5, K1, P3, K1, P 13.

Row 32: K 12, P1, K3, P1, K5, P1, K3, P1, K9, P1, K3, P1, K5, P1, K3, P1, K 12.

Row 33: P 12, K1, P3, K1, P5, K1, P3, K1, P9, K1, P3, K1, P5, K1, P3, K1, P 12.

Row 34: K 11, P1, (K3, P1, K5, P1) twice, (K5, P1, K3, P1) twice, K 11.

Row 35: P 10, K1, (P3, K1, P5, K1) twice, P1, K1, (P5, K1, P3, K1) twice, P 10.

Row 36: K 10, P1, (K3, P1, K5, P1) twice, K1, P1, (K5, P1, K3, P1) twice, K 10.

Row 37: P9, K1, P3, K1, (P5, K1, P3, K1) 4 times, P9.

Row 38: K8, P1, K3, P1, K5, P1, K3, P1, (K5, P1) 3 times, K3, P1, K5, P1, K3, P1, K8.

Row 39: P8, K1, (P3, K1, P5, K1) twice, (P2, K1) twice, (P5, K1, P3, K1) twice, P8.

Row 40: K7, P1, (K3, P1, K5, P1) twice, K2, P1, K1, P1, K2, P1, (K5, P1, K3, P1) twice, K7.

Row 41: P6, K1, (P3, K1, P5, K1) twice, P2, K1, P3, K1, P2, K1, (P5, K1, P3, K1) twice, P6.

Row 42: K6, P1, (K3, P1, K5, P1) twice, K2, P1, K3, P1, K2, P1, (K5, P1, K3, P1) twice, K6.

Row 43: P5, K1, (P3, K1, P5, K1) twice, P2, K1, P5, K1, P2, K1, P5, (K1, P3, K1, P5) twice.

Rows 44-85: Repeating rows in reverse order, repeat Row 42 through Row 1.

Bind off all sts in knit.

With wrong sides together, matching stitches and rows, sew around three sides, insert pillow form and sew last side. 


2. LACY SHELLS
MATERIALS
Worsted Weight Yarn:
5 ounces, (140 grams, 325 yards)
Knitting needles, size 7 (4.50 mm) or size needed for gauge
Yarn needle
Pillow form - 14" square

GAUGE: In pattern, 14 sts = 23/4"

PILLOW COVER (Make 2)
Cast on 72 sts loosely.

Row 1 (Right side): Knit across.

Row 2: Purl across.

Row 3: K2,   YO (Fig. 5b), P1, P3 tog (Fig. 2), P1, YO (Fig. 5c), K2; repeat from  across.

Row 4: Purl across.

ePattern Classic Knit Pillows

Repeat Rows 1-4 for pattern until piece measures approximately 14" from cast on edge, ending by working Row 4.

Bind off all sts loosely in knit.

With wrong sides together, matching stitches and rows, sew around three sides, insert pillow form and sew last side. 

GENERAL INSTRUCTIONS
ABBREVIATIONS
C2B       Cable 2 Back
C4B       Cable 4 Back
C2F       Cable 2 Front
C4F       Cable 4 Front
K           knit
mm       millimeters
P           purl
PSSO     pass slipped stitch over
RT         Right Twist
st(s)      stitch(es)
T2B       Twist 2 Back
T3B       Twist 3 Back
T2F       Twist 2 Front
T3F       Twist 3 Front
tog        together
YO        yarn over
 — work instructions following  as many more times as indicated in addition to the first time.
( ) or [ ] — work enclosed instructions as many times as specified by the number immediately following or work all enclosed instructions in the stitch indicated or contains explanatory remarks.


GAUGE
Exact gauge is essential for proper size. Before beginning your Pillow Cover, make a sample swatch in the stitch, yarn, and needle specified. After completing the swatch, measure it, counting your stitches and rows carefully. If your swatch is larger or smaller than specified, make another, changing needle size to get the correct gauge. Keep trying until you find the size needle that will give you the specified gauge.

KNIT 2 TOGETHER
(abbreviated K2 tog)
Insert the right needle into the front of the first two stitches on the left needle as if to knit (Fig. 1), then knit them together.


Fig. 1


PURL 3 TOGETHER
(abbreviated P3 tog)
Insert the right needle into the front of the first three stitches on the left needle as if to purl (Fig. 2), then purl them together.

Fig. 2


SLIP 1, KNIT 1, PASS SLIPPED STITCH OVER
(abbreviated slip 1, K1, PSSO)
Slip one stitch as if to knit (Fig. 4a). Knit the next stitch. With the left needle, bring the slipped stitch over the knit stitch (Fig. 3) and off the needle.

Fig. 3


SLIP 1, KNIT 2 TOGETHER, PASS SLIPPED STITCH OVER
(abbreviated slip 1, K2 tog, PSSO)
Slip one stitch as if to knit (Fig. 4a), then knit the next two stitches together (Fig. 1). With the left needle, bring the slipped stitch over the stitch just made (Fig. 4b)and off the needle.

Fig. 4a


Fig. 4b


YARN OVERS
After a knit stitch, before a knit stitch
Bring the yarn forward between the needles, then back over the top of the right hand needle, so that it is now in position to knit the next stitch (Fig. 5a).

Fig. 5a


After a knit stitch, before a purl stitch
Bring yarn forward between the needles, then back over the top of the right hand needle and forward between the needles again, so that it is now in position to purl the next stitch (Fig. 5b)

Fig. 5b


After a purl stitch, before a knit stitch 

Take yarn over right hand needle to the back, so that it is now in position to knit the next stitch (Fig. 5c).


Fig. 5c


FREE FOR YOU from Leisure Arts, Inc. ©2012 All rights reserved. These instructions may be photocopied and shared with your friends. They may not be kitted or sold. We have made every effort to ensure that these instructions are accurate and complete. We cannot, however, be responsible for human error, typographical mistakes, or variations in individual work. 

Popular Posts

Total Pageviews