Monday, February 27, 2012

Free Lucky Clover Crochet Afghan Throw Pattern


Red Heart Lucky Clover ThrowThis Lucky Clover Throw Afghan brings out the Irish in all of us.
Crochet this one of a kind pattern for daily use or as a gift.  You don’t have to be Irish to enjoy this symbol of optimism and good luck! Crochet this wonderful throw to brighten someone’s day or wish them good luck.
The pattern is Easy and can be made using Red Heart Green and White Yarns.


Saturday, February 25, 2012

Vintage Crochet Clover Leaf Edging Pattern


A lovely addition to pillow slips or towel edges, this cloverleaf edging works up quite a rapidly. To make an edging approximately 2 ½ inches wide you will need a ball of number of 30 crochet cotton in the color of your choice and a number of 10 steel crochet hook.
Abbrevations:
  • Ch           (chain)
  • Dc           (double crochet)
  • Sk           (skip)
  • St            (stitch)
  • Sc            (single crochet)
  • Lp           (loop)
Row 1: Ch 16, sk 3 ch sts, dc in each of next 2 ch sts, sh 2, sk 2 sts, dc in each of next 3 sts, ch 6, sk 5 sts, dc in next st, ( ch 2, dc in same st) 3 times, ch 1, turn.
Row 2: * ( r dc, sc) in next ch lp, ( sc, 5 dc, sc) in each of next 2 ch lps, ch 6, * 2 dc in each of nect 2 dc, dc in next dc, ch 2, dc in each of next 2 dc, dc in top of turning ch, ch 3, turn.
Row 3: Dc in each of next 2 dc, ch 2, dc in each dc to last dc, 2 dc in last dc of group, ch 6, dc in center st if center leaf on clover leaf, ( ch 2, dc in same st ) 3 times, ch 1, turn.
Row 4: Repeat from * to * in row 2, 2 dc in first dc of dc group, dc in each remaining st in dc group, ch 2, dc in each of next 2 dc, dc in turning ch, ch 3, turn.
Tatted Flower Edging

This Dainty edging offers unlimited possibilities for combining colors. You will need one ball each of tatting cotton in the two colors used and one tatting shuttle.
Abbreviations:
  • R             ( ring)
  • Ds           (double stitch)
  • P             (picot)
  • Rw          (reverse work)
  • Ch           (chain)
  • Sep        (separated)
  • Cl r          (close ring)
Fill shuttle with the color thread to be used for flowers. Make a r of 1 ds, 9 p sep by 1 ds, 1 ds, cl r. Tie white ( or second color) ball thread to shuttle thread. Make a ch of 6 ds, 3 p sep by 6 ds, 6 ds join in 5th p of r, 6 ds, rw. * R of 1 ds, 9 p sep by 1 ds, 1 ds, cl r, rw. Ch 6 ds, join to first free p of adjacent ch, 6 ds, 2 p sep by 6 ds, 6 ds, join in 5th p of last r, 6 ds, rw. Repeat from * for length desired. Cut and tie threads.
You May also enjoy:


Wee Irish Chain Baby Afghan ePattern

Friday, February 24, 2012

Free Hop Along Bunny Knitting Pattern


A Sweet little bunny to make to hop into your child's arms! Knit this striped bunny in three bright colors and create a comforting friend that can go wherever a child goes.
The skill level is easy and is made with Red Heart bubble gum, hot pink and daffodil yarns.
The bunny measures 16" tall.


Thursday, February 23, 2012

Make a Flower Pot Bird Bath

greatlakesbirdbath.jpg (99226 bytes)


With a little bit of paint and some glue, you can turn terra cotta flower pots into a charming bird bath for any size yard.  These one of a kind bird baths can be made using simple terra cotta flower pots that you already have or just go purchase some inexpensive ones in the size of your choice.
Since terra cotta flower pots are non-toxic it's a great option for yard decor. 
Painting the pots can be a great project for family fun.


Phat Tommy 3 ft x 2 ft Cedar Raised Garden

Monday, February 20, 2012

Crochet Duck Pond Play Set Pattern

Duck Pond Playset by Melissa Mall
This adorable duck pond play set is just in time for Spring.


Pattern designed by Melissa Mall and is feature on the web site by following the link below...
Entertaining children in the car or at a restaurant can be challenging. Only so many toys can fit in a purse or diaper bag, and the kids are always looking for something new! This cute little portable playset features two finger puppets – a duck and a duckling – and a drawstring duck pond so you can pack the fun along with you in a self-contained little bag.  Made using Red Heart Yarn, and some skill is required.

Sunday, February 19, 2012

Make a Sock Easter Bunny and Easter Crafts


How To Make Felt Bunny Tags
Using one of those missing socks leftover from the laundry or a sock a sock that is left from one that was destroyed these adorable Easter bunny socks can be made with the kids.  A fun Kids crafts to do in school or during spring break all you need is a few socks (hint there are some great finds at the dollar store), stuffing, rubber bands, ribbon, scissors, tacky glue, and a cotton ball.

View Free Easter Craft Ideas and Patterns


How To Make Perler Egg Garland

Saturday, February 18, 2012

Free Quilt Pattern Nordic Winter Quilt


This Quilt pattern features Nordic Winter Quilt  Cozy up and get quilting by making your own version of this Nordic Winter Quilt. Simply download the pattern and GO! Use your favorite GO! Cutter to make cutting all of those crisp geometric shapes a cold snap. Whether you choose folksy fabrics or a modern palette, you will love how this quilt brings winter magic home. The finished size is 47" x 47"  
Fabrics are Cotton and Steel Fabrics
You May also enjoy


FREE GO! Diamonds Squared Pattern


Friday, February 17, 2012

Free Crochet Shamrock St. Patrick's Day Pattern

Shamrock Cup Cozy (Crochet) Free Pattern


St. Patrick's Day Crochet Patterns
Make a few shamrock patterns for that lucky person in your life with these fun shamrock and St. Patrick's Day Crochet Patterns

Shamrock Headband Free Crochet Pattern

Free Crochet Shamrock Headband Pattern

Thursday, February 16, 2012

Quick Items to Crochet - Kindle Download


You do not need a Kindle to download the book it can be viewed on your PC, Laptop, iPhone, iPad, Kindle and other applications. Learn More....
If you are a member of Amazon Prime you will be able to borrow it for free at anytime
If you enjoy the book please leave a review on Amazon ...
These vintage patterns are as follows..
A collection of 20 vintage crochet patterns make great items for gifts, craft fairs, and home decorating. 
Learn tricks to transform everyday store items into charming shower gifts or conversation pieces for your home. Make intriguing additions to your wardrobe, or fast money¬makers for craft fairs. Originally made with J. & P. Coats or Clark's O.N.T. threads, these Quick Tricks will be budget-savers to you and objects of admiration to your friends!
Contents
Rose Kitchen Set
Candy or Nut Cup
Daffodil Hanger
Fuchsia Hanger
Gladiola Curtain Tie-Back
Daisy Chain Curtain Tie-Back
Shade Pull Doll
Hat and Bag Set I
Hat and Bag Set II
Circular Handkerchief Edging
Floral Slippers
Bridal Garter
Jewelry Set
Hot Plate and Platter Mats
Plate Ruffle
Dish Cloth Apron
Salad Set Pot Holder, 
Boutonniere
Headband or Belt
Basket Towel Set
If miss the free download check back here for more free patterns daily
Don't forget to leave us your comments below....

Tuesday, February 14, 2012

Free Knitting Pattern for a Little Baby Girl's Dress


Free Knitting Pattern Party Girl Dress Pattern (Knit)


An adorable dress pattern for your baby girl....
Easy to Knit Patterns Free Baby Girl Dress Patterns
Skill Level: Intermediate

Saturday, February 11, 2012

Crochet Bikini Swimsuit Pattern from 1970's


These retro crocheted bikini pattern(s) are one of a kind.  A groovy fashion from the Needleworks & Crafts magazine in 1970.  Note the sizes may be different than what we are today so modifications will have to be made and since this is an original pattern yarn will have to be substituted with what is available.
Directions are for size 8.  Changes for sizes 10 and 12 are in parentheses.
Body Bust Size:  31-1/2" (32-1/2" - 34").Finished Bust Size:  Bra (closed):  31-1/2" (32-1/2" - 34")MATERIALS:  Phentex (a "no-stretch" type yarn/thread):  For each bikini, (1) 4-oz skein main color (MC) and 1 skein contrasting color (CC).  Crochet hook size "I" or 8.


GAUGE:  7 sc = 2"; 3 rows = 1"Note:  Always work in back lp of each st.
PANTIES:  GENERAL DIRECTIONS:  Beg at front waistline with MC, ch 35 (38-41).Row 1:  Sc in 2nd ch from hook and in each ch across--34 (37-40) sc.  Ch 1, turn each row.  Check gauge; row should measure 9-3/4" (10-3/4" - 11-1/2") wide.Row 2:  Working in back lp (see Note), sk first sc, sc in next sc and in each sc to within last 2 sc, sk next sc, sc in last sc--2 sc dec. Repeat row 2, 13 (14-15) times-6 (7-8) sc. Work even for 8 rows.   Next Row:  Work in sc, working 2 sc in first and last sc--2 sc inc. Repeat last row 23 (24-25) times-54 (57-60) sc. End off. 
TASSELED BIKINI: PANTIES:   Follow General Directions; do not end off.   Waistband:  Working in back lp, sc across last row and continue around starting ch at front waistline--88 (94-100) sc.   Do not join; working around, work 3 more rnds. Cut MC; join CC.  With CC, work 1 rnd. End off.   With MC, work 1 rnd sc around each leg, easing into desired fit. Cut MC; join CC. Work 1 rnd sc. End off.   With CC, make four 4" tassels; attach   two to each side of panties. 
BRA: First Cup:  Beg at front edge with MC, ch 18 (20-22).   Row 1:  Sc in 2nd ch from hook and in each ch across--17 (19-21) sc. Ch 1, turn each row.  Row 2:  Working in back lp, sk first sc, sc in next sc and in each sc across--1 sc dec at side edge. Row 3:  Sc in each sc to within last 2 sc, sk next sc, sc in last sc--1 sc dec at side edge. Repeat last 2 rows until 1 st remains. End off. Make 2nd cup same as first cup.
FINISHING:  With MC, work 1 row sc around first cup, working 3 sc in each of 3 corners. With CC, work 1 row sc around. Turn 2nd piece to reverse side, finish as for first cup. With dec edge of cups at top and straight edge of cups at bottom, weave front edges tog for 3/4" at lower edge. Join CC to side point, make chain 15" long. Repeat on other side point. Repeat on top points, Tie 1" end of each top tie around corresponding side tie with a slip knot to make shoulder straps.


TIED BIKINI: PANTIES:  Follow General Directions. With MC, work 2 rows sc around each leg. Waistband and Ties:  With MC, ch 20, sc in back lp of each st on last row on panties, ch 21. Turn. Next Row:  Sc in 2nd ch from hook and in each ch and sc across. End off. Work in  same way across front starting ch. With  CC, work 1 row sc around entire outer edge of panties. End off.
BRA: First Cup:  Beg at lower edge, with MC, ch 21 (23-25). Sc in 2nd ch from hook and in each ch across--20 (22-24) sc.  Ch 1, turn each row.  Rows 2-6:  Sc in each sc across.  Row 7: Sk first sc, sc in next sc and in each sc to within last 2 sc, sk next sc, sc  in last sc-2 sc dec. Repeat last row 8 (9-10) times--2 sc remain. Do not turn; continue to work sc down one side of. cup  to lower edge. Ch 1, turn.  Next Row:  Sc in each sc to upper edge, make ch 12" long for strap. Turn.  Next Row:  Sc in 2nd ch from hook and  in each ch, sc down other side of cup to lower edge. End off.  
Make 2nd cup same as first cup, until 2 sc remain. Sl st in 2 sc and continue as for first cup.
Join Cups and Ties:  With MC, make 13" ch, sc along lower edge of first cup, pulling in slightly, ch 2, sc across 2nd cup,  pulling in slightly, make ch 13" long. Turn.  Next Row:  Sc in 2nd ch from hook and in each ch and sc across. End off. With CC, work 1 row sc around outer edge. End off.  Sew shoulder straps to side straps. 

View Crochet Swimsuits and Patterns on eBay
Note:  If you enjoy these patterns please feel free to comment or follow us by clicking the follow link on the side of the page.
Sexy SwimWear to Crochet eBook

Thursday, February 9, 2012

Plastic Canvas Patterns Patterns Stitch Dictionary

Plastic Canvas Stitch Dictionary


There are so many plastic canvas and craft patterns available all over the Internet that it would take hours of searching just to find the pattern you want.
One suggestion for plastic canvas is converting regular needlepoint patterns into plastic canvas patterns. 
You won't believe how much fun you can have with plastic canvas! With this handy reference guide of 113 stitches, you'll breeze through all kinds of plain and fancy projects, joining methods, and other techniques.
Plastic Canvas Stitch Dictionary


300+ Magnets In Plastic Canvas

Plastic Canvas Kissers

Wednesday, February 8, 2012

Crochet with Heavy Rug Yarn Patterns - Vintage Patterns to Crochet Kindle and Nook Patterns

Choose a cozy sweater or crochet a bathroom set, a variety of vintage patterns from rugs, tablecloths, pillows, jackets and more all using a heavy rug yarn.

Contents
Floral Bathroom Set Pattern
Women’s Jacket Pattern
Picnic Table Set Pattern
Tablecloth Pattern
Swan Bathroom Set Pattern
Round Pillow Pattern
Placemat Pattern
Hot Plate Mat Pattern
Fish Net Scarf Pattern
Fish Net Snood Pattern
Match Sticks Embroidered Rug Pattern
Covered Stocking Savers Hanger Pattern
Fringe Rug Pattern
Photos and Complete pattern(s) provided
The Best Reading Experience on Your Web Browser, PC, Mac, iPhone, iPad, BlackBerry, or Android Phone
Kindle is a great way to view patterns. Patterns can be viewed using Kindle, Kindle Apps, iPad, Laptop, PC, 


Retro Rugs Crochet Patterns

Easy Rugs to Crochet

Free Knitting Pattern Knit a Toy Lamb

Lamb_01_small2

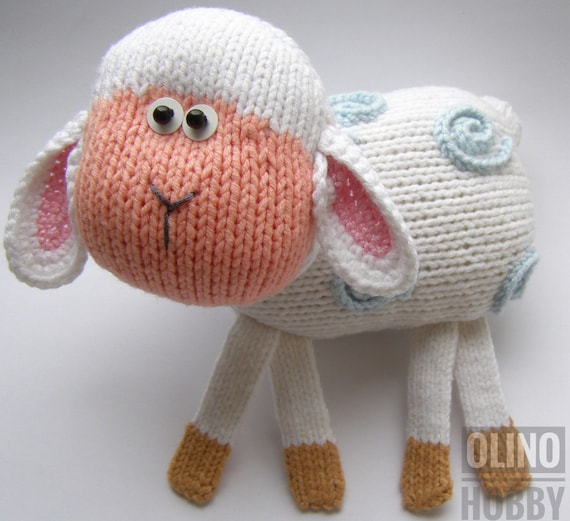
Every knitter loves a knitted lamb, both to have and to make. The boucle yarn used for the body and the curly topknot are perfect for creating that wooly look. The legs are cleverly constructed of I-cords stuffed with straws, which allow the lamb to stand on its own. His thoughtful expression and mop of hair are my favorite features. Make one for your favorite child and another for your favorite knitter—they’ll both love it.

Finished Measurements
6 1/2 inches tall when standing, 5 inches long, front to back
Yarn
• Debbie Bliss Cashmerino Astrakhan (60% wool, 30% microfiber, 10% cashmere; 77 yards/50 grams), 1 skein in Off-White #3
• Blue Sky Organic Cotton (100% organic cotton; 150 yards/100 grams), 1 skein in Sand #81
Tools
• U.S. size 4 set of four double-pointed needles, or size needed to obtain gauge
• Yarn needle
• Scissors
• Measuring tape or ruler
• Stitch marker
• Black embroidery floss
• Polyester fiberfill, 1 small bag
• Poly pellets (optional), 32-ounce bag
• 1 drinking straw
Gauge
• 6 sts per inch in stockinette stitch for the body
Back end
With Off-White and two double-pointed needles used as straight needles, cast on 4 stitches.
Row 1: kfb, k to last stitch, kfb (6 sts)
Row 2: pfb, p to last stitch, pfb (8 sts)
Rows 3 and 4: repeat rows 1 and 2 (12 sts)
Work in stockinette stitch (see p.00) until the back end measures 2 inches from the cast-on edge, ending with a purl row.
Decrease rows
Row 1: ssk, k to last 2 stitches, k2tog (10 sts remain)
Row 2: p2tog, p to last 2 stitches, p2tog (8 sts remain)
Rows 3 and 4: repeat rows 1 and 2 (4 sts remain)


Body
Continue on from the back end.
Knit the 4 stitches on the needle, then on the same needle pick up 10 stitches (see p.00), on a second double-pointed needle pick up 14 stitches, and on a third double-pointed needle pick up 14 stitches. (14 sts per needle, 42 sts total)
Place a stitch marker on the first stitch, and begin working in the round.
Increase round: (kfb, k to the last stitch, kfb), repeat on each needle (16 sts per needle, 48 sts total)
Next round: repeat the increase round one more time (18 sts per needle, 54 sts total)
Knit every round until the body measures 2 inches above the pickup round
Decrease rounds
Round 1: (k7, k2tog), repeat to end of round (16 sts per needle, 48 sts total remain)
Rounds 2–5: knit
Round 6: (k6, k2tog), repeat to end of round (14 sts per needle, 42 sts total remain)
Round 7: (k5, k2tog), repeat to end of round (12 sts per needle, 36 sts total remain)
Rounds 8 and 9: knit
Round 10: (k4, k2tog), repeat to end of round (10 sts per needle, 30 sts total remain)
Round 11: (k3, k2tog), repeat to end of round (8 sts per needle, 24 sts total remain)
Round 12: knit
Round 13: (k2, k2tog), repeat to end of round (6 sts per needle, 18 sts total remain)
Holding the body horizontally, pour a layer of poly pellets into the bottom, fill the top with fiberfill, or stuff with fiberfill only.
Round 14: (k1, k2tog), repeat to end of round (4 sts per needle, 12 sts total remain)
Round 15: k2tog, repeat to end of round (2 sts per needle, 6 sts total remain)
Finish stuffing. Cut the yarn, leaving a 6-inchlong tail, and thread the tail on a yarn needle. Pull the end through the remaining stitches, gather up tight to close the hole, and stitch to secure (see p.00). Weave the end to the inside and trim.
Tail
With Off-White, cast on 12 stitches, placing 4 stitches on each of three double-pointed needles. Join to work in the round, being careful not to twist the stitches. Place a stitch marker on the first stitch.
Knit every round until the tail measures 1/2 inch from the cast-on edge.
Decrease rounds
Round 1: (k2, k2tog), repeat on each needle (3 sts per needle, 9 sts total remain)
Round 2: (k1, k2tog), repeat on each needle (2 sts per needle, 6 sts total remain)
Round 3: (k2tog), repeat on each needle (1 st per needle, 3 sts total remain)
Cut the yarn, leaving a 6-inch-long tail, and thread on a yarn needle. Pull the end through the remaining stitches, gather up tight to close the hole, and stitch to secure. Weave the end to the inside and trim. Thread the tail from the cast-on edge on a yarn needle. Whipstitch the tail to the top of the back end. Weave the end to the inside and trim.
Legs (make 4)
With Sand and two double-pointed needles used as straight needles, cast on 4 stitches. Work in I-cord (see p.00) until the leg measures 1 inch from the cast-on edge. Bind off. Cut the yarn and pull through the remaining stitch.
Cut the drinking straw to fit inside of the I -cord. Push the straw inside of the I -cord and set aside.
Feet (make 4)
With Sand, cast on 9 stitches, placing 3 stitches on each of three double-pointed needles. Join to work in the round, being careful not to twist the stitches. Place a stitch marker on the first stitch.
Round 1: knit
Round 2: (k1, m1, k1, m1, k1), repeat on each needle (5 sts per needle, 15 sts total)
Rounds 3–7: knit
Round 8: (k3, k2tog), repeat on each needle (4 sts per needle, 12 sts total remain)
Thread the tail from the cast-on stitches on a yarn needle. Stitch through all of the stitches in the cast-on row and gather up, pulling tight to close the hole. Stitch to secure. Fill the foot with poly pellets or stuff with fiberfill. The foot is supposed to be flat, not rounded.
Round 9: (k2, k2tog), repeat on each needle (3 sts per needle, 9 sts total remain)
Round 10: (k1, k2tog), repeat on each needle (2 sts per needle, 6 sts total remain)
Cut the yarn, leaving a 6-inch-long tail, and thread on a yarn needle. Pull through the remaining stitches, gather up tight to close the hole, and stitch to secure. Weave the end to the inside and trim.
Whipstitch the feet to the back top of the legs with the cast-on tail from the legs threaded on a yarn needle, using the photograph as a guide. Whipstitch the leg to the bottom of the body, using the bound-off tail threaded on a yarn needle.
Head
With Sand, cast on 9 stitches, placing 3 stitches on each of three double-pointed needles. Join to work in the round, being careful not to twist the stitches. Place a stitch marker on the first stitch.
Round 1: knit
Round 2: (k1, m1, k1, m1, k1), repeat on each needle (5 sts per needle, 15 sts total)
Rounds 3 and 4: knit
Round 5: (k1, [k1, m1] four times), repeat on each needle (9 sts per needle, 27 sts total)
Rounds 6–15: knit
Round 16: (ssk, k5, k2tog), repeat on each needle (7 sts per needle, 21 sts total remain)
Rounds 17 and 18: knit
Round 19: (ssk, k3, k2tog), repeat on each needle (5 sts per needle, 15 sts total remain)
Round 20: knit
Round 21: (k3, k2tog), repeat on each needle (4 sts per needle, 12 sts total remain)
Thread the tail from the cast-on stitches on a yarn needle. Stitch through all of the cast-on stitches, pull up tight to close the hole, and stitch to secure. Begin to stuff the head with fiberfill.
Round 22: (k2, k2tog), repeat on each needle (3 sts per needle, 9 sts total remain)
Finish stuffing. Cut the yarn, leaving a 6-inchlong tail, and thread the end on a yarn needle. Pull the end through the remaining stitches, gather up tight to close the hole, and stitch to secure. This is the nose end of the head. Pull the tail through to the bottom side of the head and whipstitch to the front top of the body, using the photograph as a guide.
Ears (make 2)
With Sand, cast on 6 stitches, placing 2 stitches on each of three double-pointed needles. Join to work in the round, being careful not to twist the stitches. Place a stitch marker on the first stitch.
Rounds 1–4: knit
Round 5: (k1, m1, k1), repeat on each needle (3 sts per needle, 9 sts total)
Rounds 6–9: knit
Round 10: (k1, k2tog), repeat on each needle (2 sts per needle, 6 sts total remain)
Round 11: knit
Cut the yarn, leaving a 6-inch-long tail, and thread the end on a yarn needle. Pull the end through the remaining stitches, pull tight to close the hole, and stitch to secure. Weave the end to the inside and trim. Thread the tail from the cast-on stitches on a yarn needle. Whipstitch the ears to the head, using the photograph as a guide.


LAMB Knitting Pattern PDF - Knitted lamb pattern Animal toy pattern . Knitting tutorial - How to knit cute toy Lamb

Hair

With Off-White and two double-pointed needles used as straight needles, cast on 4 stitches and begin to work in twisted loop stitch.

Row 1: complete the twisted loop stitch in every stitch, as follows:
Knit the stitch and leave it on the left needle. Pull the loop that is on the right needle out about 2–3 inches (depending on how long the twist should be). Transfer the loop onto your right index finger. Twist the loop in one direction until it folds back on itself.
Place the loop back on the left needle.
Knit the two stitches together.
Row 2: purl
Row 3: repeat row 1
Row 4: p2tog twice (2 sts remain)
Bind off. Cut the yarn and pull through the last stitch, leaving a 6-inch-long tail. Thread the tail on a yarn needle and whipstitch the hair to the top of the head between the ears. Weave the end to the inside and trim.
Face and toes
With black embroidery floss and a yarn needle, create the eyes with 2 small straight stitches each. Create the nose with straight stitches. On each foot, take a stitch at the center front of the foot, stitching over and under the foot, using the photograph as a guide.


Woolie Lamb Knitting Pattern

Excerpted from ITTY-BITTY TOYS by Susan B. Anderson (Artisan Books).Copyright 2009. Liz Banfield photographer.                                            


Itty-Bitty Toys: How to Knit Animals, Dolls, and Other Playthings for Kids - Available at Amazon

Popular Posts

Total Pageviews